Do you want some extra lighting in your bathroom? Wondering how you can get the LED strips in your bathroom without ruining it? You’ll see that in this post.
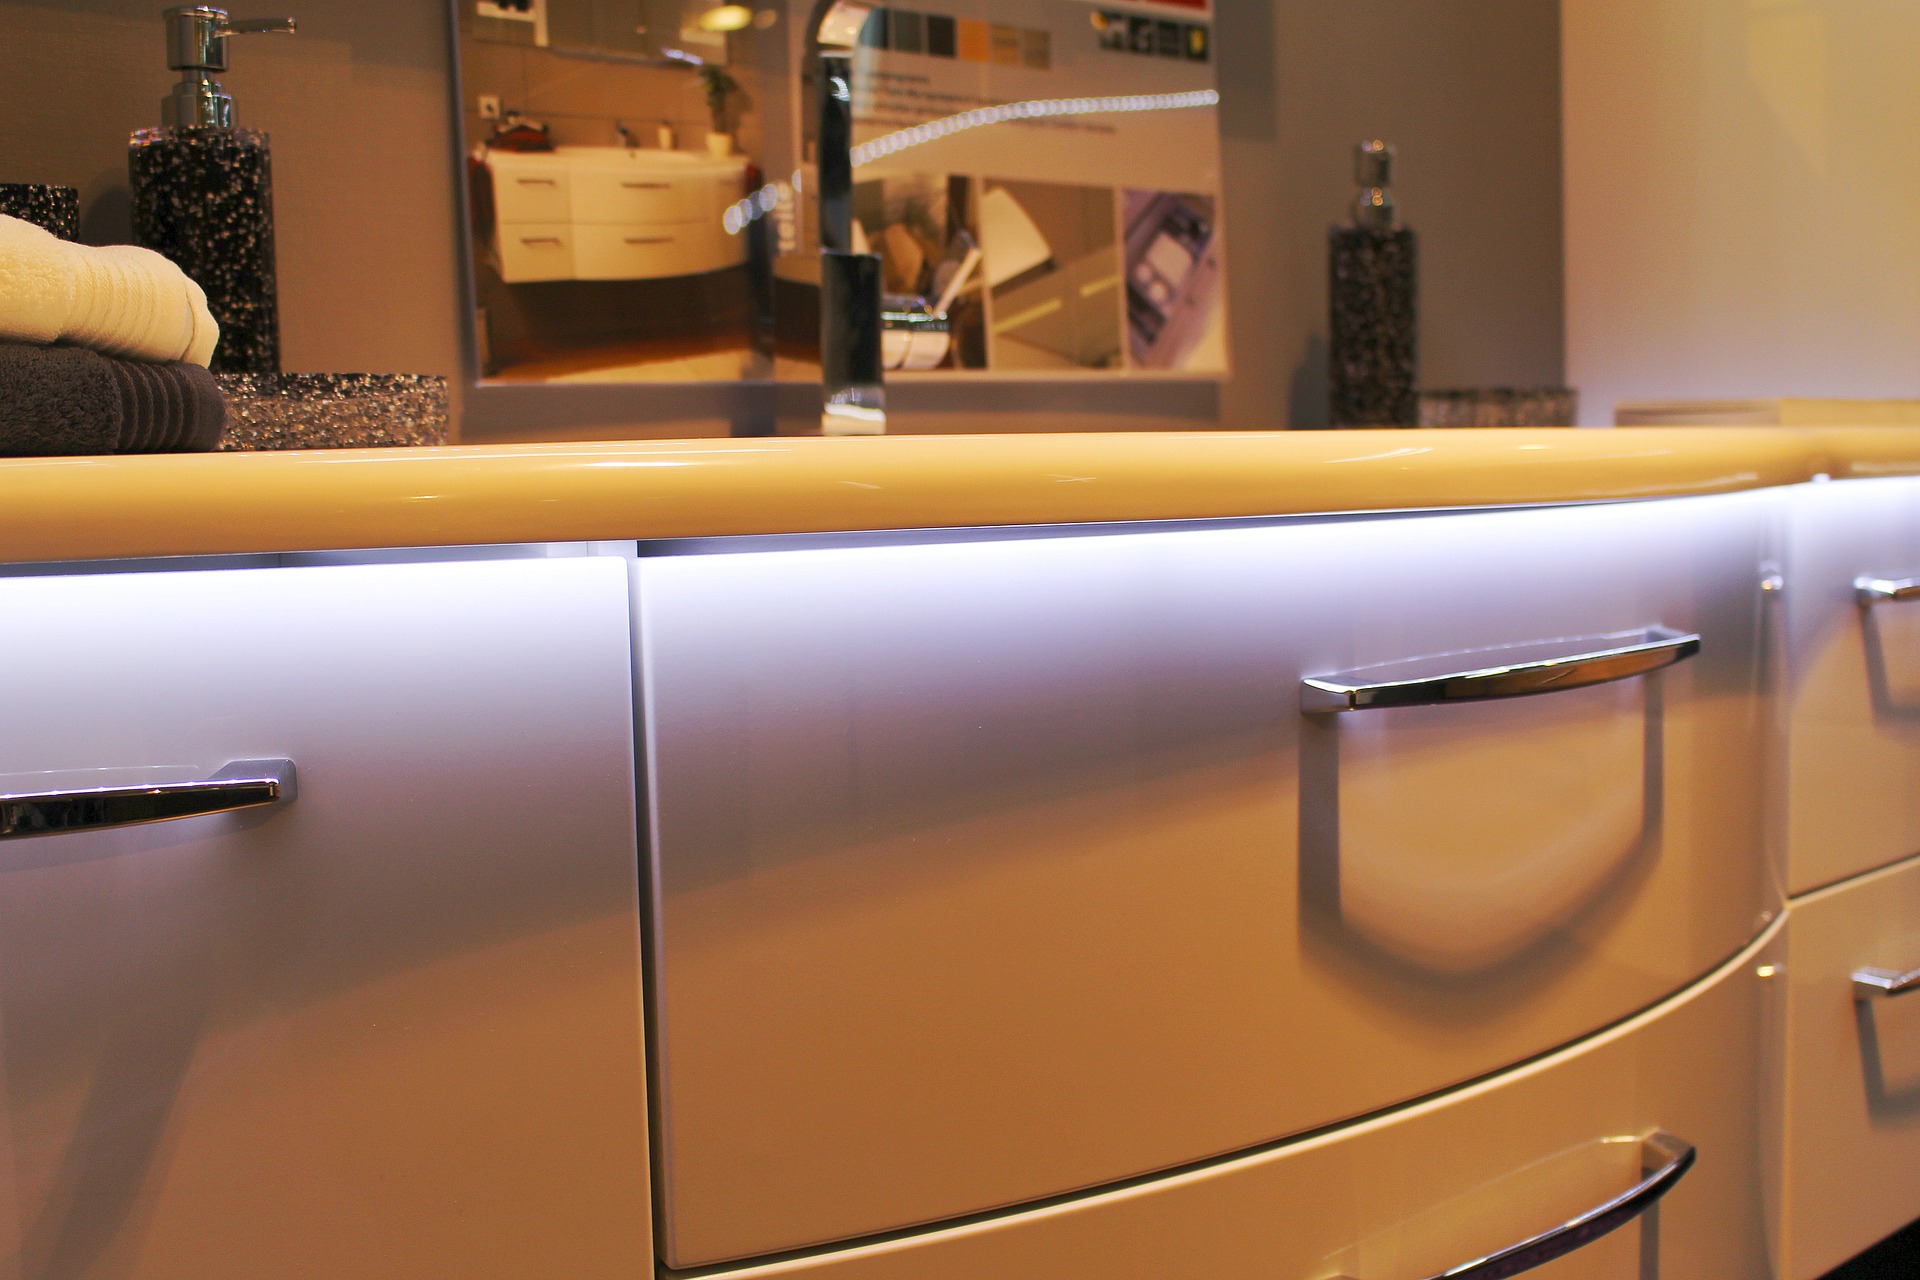
Installing LED strips in bathrooms has become a new trend. It’s even more common than you’d think. Because it is easy to get these strips into corners to improve a bathroom’s aesthetics and brightness, you’ll find this décor more prevalent. Also, it’s more beneficial because of its increased versatility and water resistance. You can tape it in the shower, on mirrors, and ceilings.
However, the challenge comes when you when installing the bathroom LED light. Many have complained that it is a daunting task to handle alone. This might have a little truth, but you could always get your way around it with a bit of guidance. Here are some tips to help you install LED strips in bathroom with ease!
1. Take an accurate measurement.
First of all, you will have to measure the area you intend to tape the strip lights on. Afterward, measure the exact length of the LED strips corresponding to what you need to cover. Ensure that you add a few inches to accommodate edges if you’re going to have any. Use an accurate measuring tape, so you don’t make mistakes.
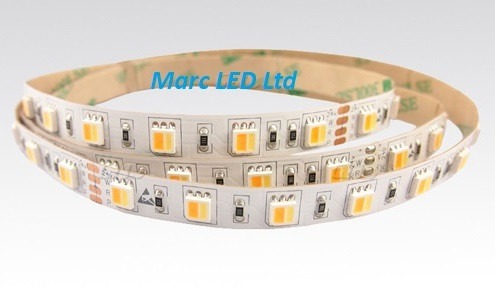
2. Carefully cut the strips to the required length.
You might need to cut the strip to fit the length you’ve measured. Cutting the strips requires caution so you don’t damage them. Before you cut, read all the instructions included on the strips. Only cut on areas highlighted by the manufacturer. These areas are marked safe for cutting because cutting on the wrong spot will ruin the functionality of the strip.
3. Assess the connection
After cutting, using a wire connector to join the pieces may be required. So, after getting the required length, get a strip connector to create a new connection between them.
After doing that, adjust all the wires. Properly evaluate the connection, connect the strips to the power supply, and ensure that all wires are placed in the correct position. This will make it easier as you begin installing the strips.


4. Install the strips
This is the final step! Now that you’ve connected the strips to the required length, the next step is to install the strip by peeling and sticking. It’s that easy!
Peel off the adhesive tape from the strip and start sticking the Led lights on the area you want to cover. While sticking it, ensure that you gently press it over the site to form a secure fit.
If your strip light doesn’t come with adhesive tape, get a double tape or some silicone gel to install it.
And THAT’S IT! You can now enjoy all the benefits you can get from installing LED strips in your bathroom.